

I don't know what happened with these cereal marshmallows. I guess I kind of got caught up in the whole crazy idea of them...and then actually spent the hours of time to make them and cut out all the tiny shapes (uhh...which I still have sitting around...). I totally spent money to have mini tiny cookie cutters sent from Amazon, and I bought orange flower water...and made corn syrup. It all seems kind of crazy now in retrospect, but they actually came out awesome and were a part of my January 24x24 for Foodbuzz, so here they are. There's a lot to be expected from a cereal marshmallow recipe - they should be sweet and crispy and hopefully taste like a box of Lucky Charms. Well, I tasted both back to back and while I'll admit they're not an exact replica, I can't imagine a recipe that comes any closer.


Homemade Cereal Marshmallows
1 3/4 ounces (7 packets of Knox) gelatin
3 cups cold water, divided
2 ounces old fashioned oats (not the quick cooking kind)
1 vanilla bean, split and seeds reserved
12 ounces homemade corn syrup
30 ounces sugar
1/2 tsp salt
1 tbl pure vanilla extract
1/4 tsp orange flower water
2 small drops of almond extract (1/8 tsp)
various food coloring
Have three or four lightly greased cookie sheets standing at the ready.
In the bowl of a stand mixer combine the water and gelatin, set aside.
In a largish, heavy bottomed pot combine the water, vanilla bean (not the seeds) and oats. Bring to a simmer and cook for about ten minutes. Shut off the heat and strain out the solids (the remaining "liquid" will be very thick). Discard the oatmeal solids.
Combine the strained liquid, corn syrup, sugar, salt, and vanilla bean scrapings. Set over medium heat and stir gently until the mixture starts to simmer. Keep cooking, undisturbed, until the mixture reaches 240 degrees on a candy thermometer. You may notice the mixture beginning to crystallize a little around the edges, but that is fine. Once the mixture comes to temperature shut off the heat and let it stand until it cools to 210 degrees. This is important.
Once the mixture has cooled to 210 degrees pour all of it into the mixing bowl with the awaiting gelatin. (Again, if you notice the mixture is crystallized, don't worry). Fit the bowl with the whisk attachment and crank it up to medium-high speed.
Let the mixture whip until it has really increased in volume. If it seems like it's going to overflow the stand mixer bowl you can always whip out a hand mixer (I found doing this to be helpful). At this point you can add in the vanilla extract, orange flower water, and almond extract. Keep whipping until it has really increased in volume and doesn't seem to be incorporating anymore air.
Shut off the mixer. If you’re just making white marshmallows, simply divide the fluff between each sheet pan, then spread it as thinly as you can with a spatula. If you’d like to make different colors, divide the mixture into as many bowls as you’d like colors and stir food coloring into each. Then spread each color across a patch of the cookie sheet; it’s okay if the colors touch each other, you will separate them when it’s time to cut the marshmallows.
Set the trays of marshmallows in a dry, well ventilated location where you feel safe leaving them, uncovered, for twenty four hours. No powdered sugar on top. No plastic.
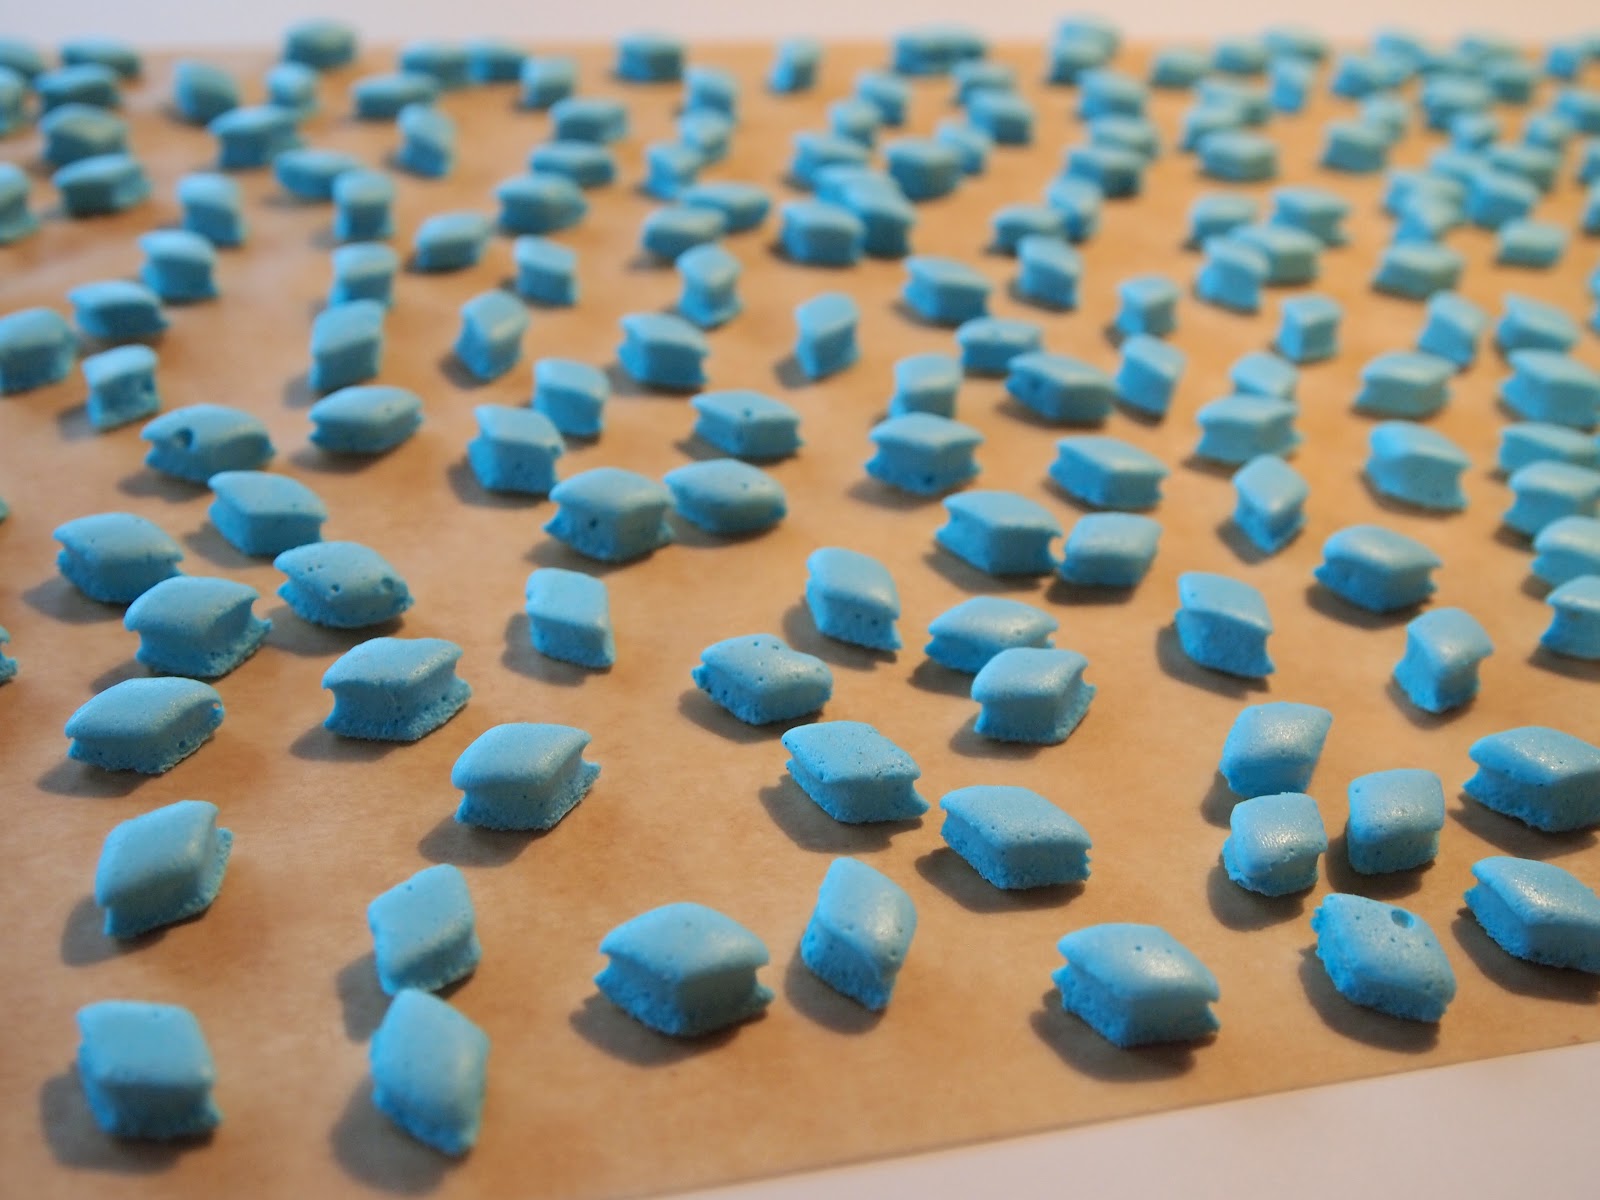
After the marshmallows have dried for 24 hours, peel the big sheet of marshmallows up from the cookie sheet. If you're using cookie cutters to stamp the marshmallows into shapes you can begin this; it’s easiest to punch the through slightly damp side, not the crusty side. If you're going to use a knife to cut the marshmallows into squares or diamonds you can let the marshmallow sheets dry out (flipped damp side up) for another 24 hours before doing this.
Transfer the marshmallow cut outs to a parchment lined cookie sheet (damp side up if using cutters). Allow them to dry for another 24 hours or up to 48. The longer you let them dry, the crisper they will become. You may find, depending on temperature and humidity in your kitchen, they take more or less time to dry.
Store the marshmallows, indefinitely, in a plastic bag or airtight container. If you’d like to store them for eternity, do so in the freezer.
Source: Recipe adapted from Brave Tart.


5 Response to Homemade Cereal Marshmallows
These are so cool!!! My mind is blown. I love Lucky Charms, and obviously, the marshmallows are the best part. I'm so in love with this!
Haha, not that I like marshmallows (with or without cereal), but how cool! :)
I cannot wait to try this!
How amazingly cool!
Wow... I loved your 24x24!! Really beautifully done and those mini cookie cutters are adorable. :)
These are incredibly cute! I now want to buy those miniature cookie cutters that I never could think of a purpose before.
Post a Comment